Facebook Ads Data Connector User Guide
Facebook Ads is a powerful advertising platform that allows businesses to reach their target audience on Facebook, Instagram, and across the web. This guide will walk you through how to connect your Facebook Ads account to Power My Analytics, create reports in Data Studio, and understand key metrics and considerations when working with Facebook Ads data.
Prerequisites
Before connecting Facebook Ads to Power My Analytics, ensure you have:
- Ad Account Analyst access to the Facebook account you want to connect
Adding Facebook Ads as a Data Source
To add Facebook Ads as a data source in Power My Analytics:
- To add the correct Facebook account, you must be logged in to that account in your browser. Open an Incognito window in your browser to log into the correct Facebook account before connecting with Power My Analytics.
- Navigate to your Hub and select Sources from the menu.
- Click + Add new source and choose Facebook Ads from the gallery.
- Sign in to your Facebook account to authenticate.
- Grant Facebook business access: Select "Opt in to all current and future Businesses". Click Continue.
- Grant Facebook page access: Choose "Opt in to all current and future Pages". Click Continue.
- Grant Instagram account access: Select "Opt in to all current and future Instagram accounts". Click Continue.
- Finalize permissions: Click Save, then click Got it.

Power My Analytics' former Instagram Ads data connector has now been merged into the Facebook Ads data connector, and Instagram advertising data is provided through the Facebook Ads connector.
Creating a Data Studio Report
To create a Data Studio report using your Facebook Ads data:
- After adding Facebook Ads as a data source in the PMA hub, navigate to Reports > Data Studio
- Select Facebook Ads under Create Data Studio Report (opens official Data Studio application in new window)
- Google Data Studio Configuration:
- Step 1:
- Name your data source (e.g. "Facebook Ads - Organization Name")
- Choose your Power My Analytics hub from the dropdown
- Optional: Leave "Use report template for new reports" checked for PMA demo template
- Click Next
- Step 2:
- User Account: Select Facebook Ads account (real data) or "Sample Account" (sample data)
- Click Next
- Step 3:
- Choose "Ad Accounts" and "Currency" for reports
- Optional: Allow "Ad Accounts" modification in reports
- Click Connect (top right) to complete the data source configuration
- Step 4:
- Click Create Report (top right)
Note: If you need to configure the setting "Is Campaign using SKAdNetwork?" to "true" when creating a report, please submit a support ticket to PMA and we will assist you.
Key Reports and Fields
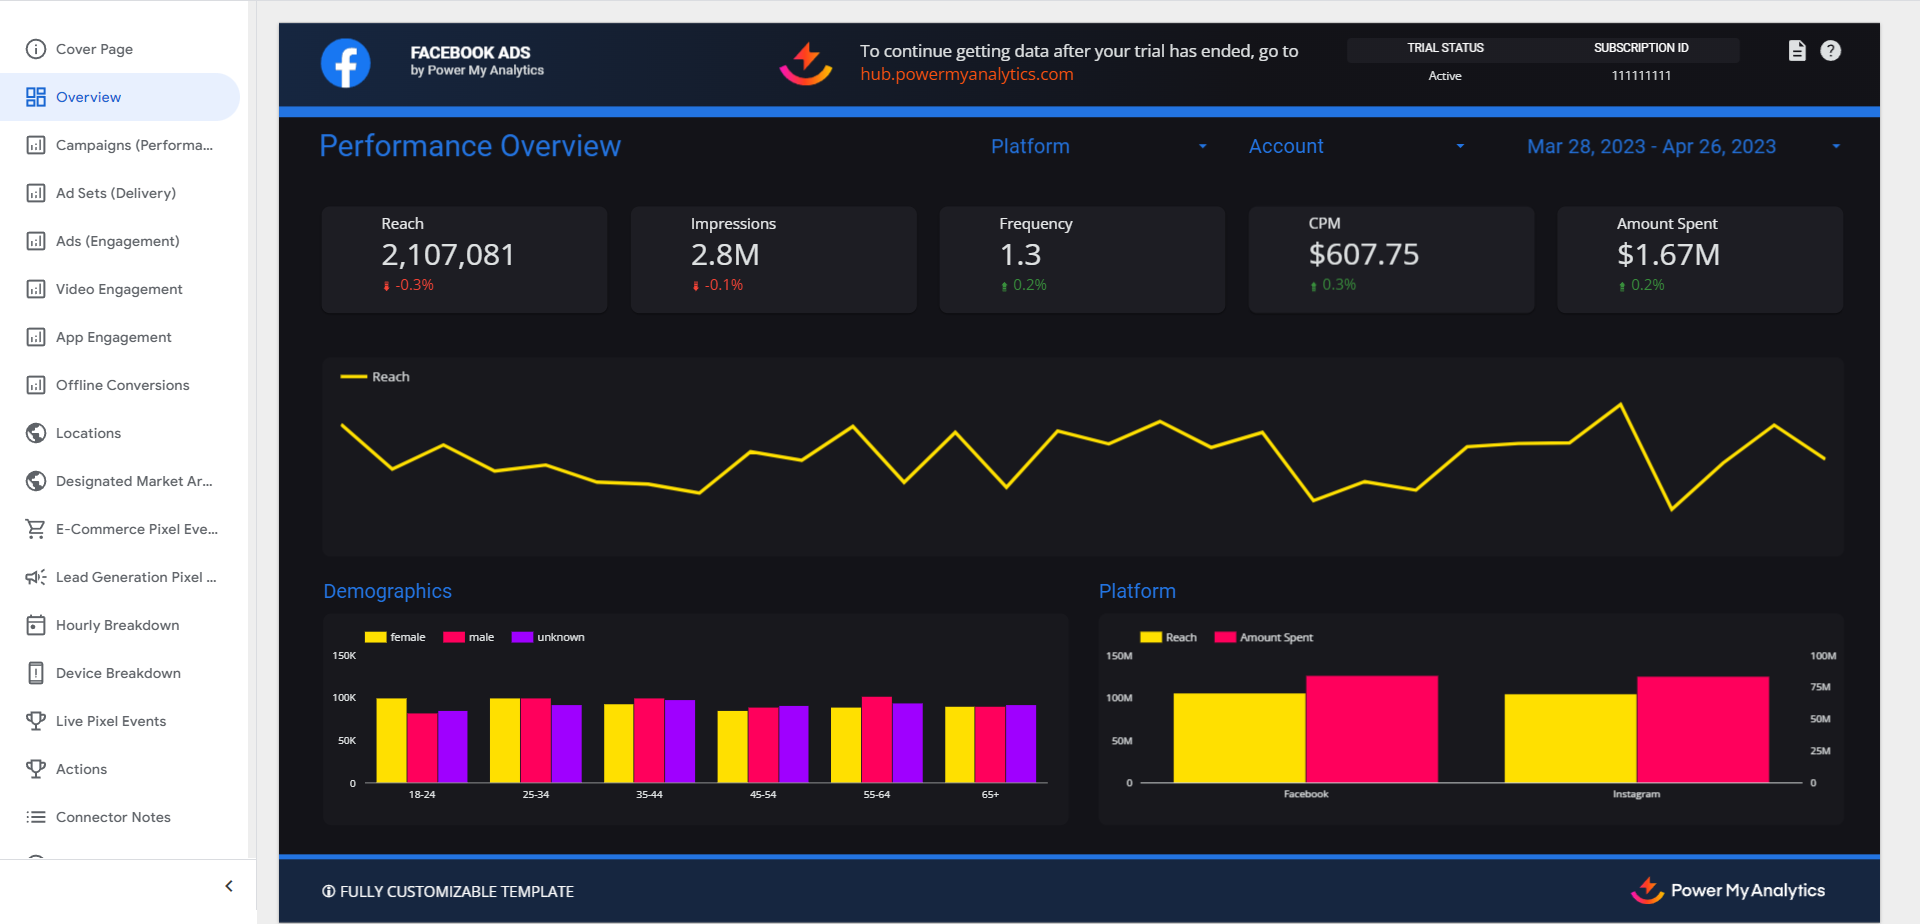
Popular metrics and reports for Facebook Ads include:
- Performance Overview Metrics: Reach, Impressions, Frequency, CPM, Amount Spent
- Campaigns (Performance) Metrics: Reach, Impressions, Amount Spent
- Ad Sets (Delivery) Metrics: Reach, Frequency, Cost per 1,000 People Reached, Impressions, CPM
- Ads (Engagement) Metrics: Post Reactions, Post Comments, Post Saves, Link Clicks, Page Likes, CPC
- Video Engagement Metrics: Video Plays, ThruPlays, DMA, 25%, 50%, 75%, 95%, 100%, Average Play Time
- App Engagement Metrics: Mobile App Installs, Cost Per App Installs, App Installs, Cost Per App Installs, Post Reactions, Post Comments, Post Saves, Post Shares
- Offline Conversions Metrics: Offline Purchases, Offline Purchases Conversion Value, Cost per Purchases, Offline Leads, Cost per Leads, Offline Other Conversions, Cost per Offline Other Conversions
- Locations Metrics: Reach
- Designated Market Area Metrics: Impressions, Link Clicks
- E-Commerce Pixel Events Metrics: Website Content Views, Website Adds to Wishlist, Website Adds to Cart, Website Checkouts Initiated, Website Adds of Payment Info, Website Purchases, Website Purchases Conversion Value
- Lead Generation Pixel Events Metrics: Landing Page Views, Website Content Views, Website Registrations Completed, Website Searches, Website Leads, Website Leads Conversion Value
- Hourly Breakdown Metrics: Reach, Impressions, Amount Spent
- Device Breakdown Metrics: Reach, Impressions, Amount Spent
- Live Pixel Events Metrics: Live Landing Page Views (hourly), Live Content Views (hourly), Live Leads (hourly), Live Adds to Cart (hourly), Live Purchases (hourly)
- Actions Metrics: On-Facebook Purchases, Website Purchases, Offline Leads, Website Leads
- Boosted Posts: The boosted posts associated with the campaign
- Custom Conversions
- Custom Events
For a complete list of available Facebook Ads fields, refer to the Schema Explorer.
Limitations and Important Considerations
The Facebook Ads connector has specific limitations related to backfilling, historical data availability, reach reporting, unavailable data, and working with ad image fields. It also provides workarounds for features such as custom events, custom metrics, breakdowns by objective, and result rate reporting.
For full details on all Facebook Ads connector limitations, workarounds, and considerations, see Facebook Ads Data Connector Limitations.
Troubleshooting
Follow the instructions in Troubleshooting Facebook Ads for information on issues that may affect the Facebook Ads connector.
Related Articles
Facebook Insights Data Connector User Guide
Facebook Insights provides valuable data about your Facebook Page's performance, audience, and content engagement. This guide will help you set up and use Facebook Insights as a data source in Power My Analytics. Prerequisites Before connecting ...Facebook Ads Data Connector Limitations
This article covers the limitations, considerations, and workarounds for working with Facebook Ads data in Power My Analytics. For instructions on connecting your Facebook Ads account and creating reports, see the Facebook Ads Data Connector User ...Understanding Sync Time and Data Settling with Facebook Ads
Facebook Ads data does not become immediately available at the end of each calendar day. Instead, the data "settles" gradually over several hours after midnight in the ad account's configured time zone. Understanding this settling behavior is ...How to Report Custom Conversions in Facebook Ads
Power My Analytics offers an easy way to include your custom conversions data in your Facebook Ads reports. Follow these steps to get started with reporting custom conversions in Data Studio. If you're using custom conversions with your Facebook Ads ...How to Report Result Rate in Facebook Ads
Many of our customers are looking for a way to report result rate data in their Facebook Ads reports. This article will show you how to use Power My Analytics' flexible options for reporting different result rate metrics. The Facebook Ads field ...