WooCommerce Data Connector User Guide

Are you looking to streamline your WooCommerce data analysis and reporting? Power My Analytics' WooCommerce connector automates the collection and integration of your e-commerce data, saving you time and providing deeper insights into your online store's performance. This guide will walk you through setting up the WooCommerce data source, creating reports, and understanding key metrics to help you make data-driven decisions for your business.
Prerequisites
Before connecting WooCommerce to Power My Analytics, ensure you have:
- An active WooCommerce store
- Your REST API Consumer Key and Consumer Secret for your WooCommerce store
WooCommerce Connection Issues: IP Whitelisting
If your WooCommerce sync fails with errors like “406 security incident,” “access denied,” “blocked,” or repeated authentication errors, your site’s firewall, CDN, or security plugin is likely blocking Power My Analytics. Whitelisting our IP addresses in the systems described below will allow our requests through.

Power My Analytics sends WooCommerce requests from these two static IP addresses:
34.170.217.22
34.30.28.19
Please whitelist both addresses in your firewall, CDN, or security plugin.
34.170.217.22
34.30.28.19
Please whitelist both addresses in your firewall, CDN, or security plugin.
Cloudflare Users
- Log in to your Cloudflare dashboard and select your domain.
- Go to Security > WAF.
- Click Create Firewall Rule.
- Name the rule (for example, “Allow PMA WooCommerce API”).
- In the When incoming requests match… section, enter the following expression:
(ip.src in {34.170.217.22 34.30.28.19}) - In the Then… dropdown, choose Allow.
- Click Deploy.
For further assistance, please see Cloudflare's article on how to create and edit firewall rules.
SiteGround Users

SiteGround’s sgcaptcha anti-bot system can intercept Power My Analytics requests and redirect them to a CAPTCHA challenge. If your error response includes a reference to /.well-known/sgcaptcha/, this is the cause.
In SiteGround Site Tools:
- Open Site Tools for your site.
- Go to Security > Site Scanner or Security > SG Site Scanner Whitelist (the exact path depends on your plan; on some plans the whitelist is found under Security > Sucuri Firewall).
- Add 34.170.217.22 and 34.30.28.19 to the IP whitelist.
If you also use the SG Security plugin in WordPress, repeat the whitelisting there:
- In your WordPress admin, go to SG Security > Login Security > Whitelist IPs.
- Add both 34.170.217.22 and 34.30.28.19.
Create a REST API key in WooCommerce
WooCommerce requires you to create a REST API key in order to connect with Power My Analytics. To create an API key:
- Open WooCommerce and go to Settings > Advanced > REST API.
- Click the Add key button.
- Generate a new API key.
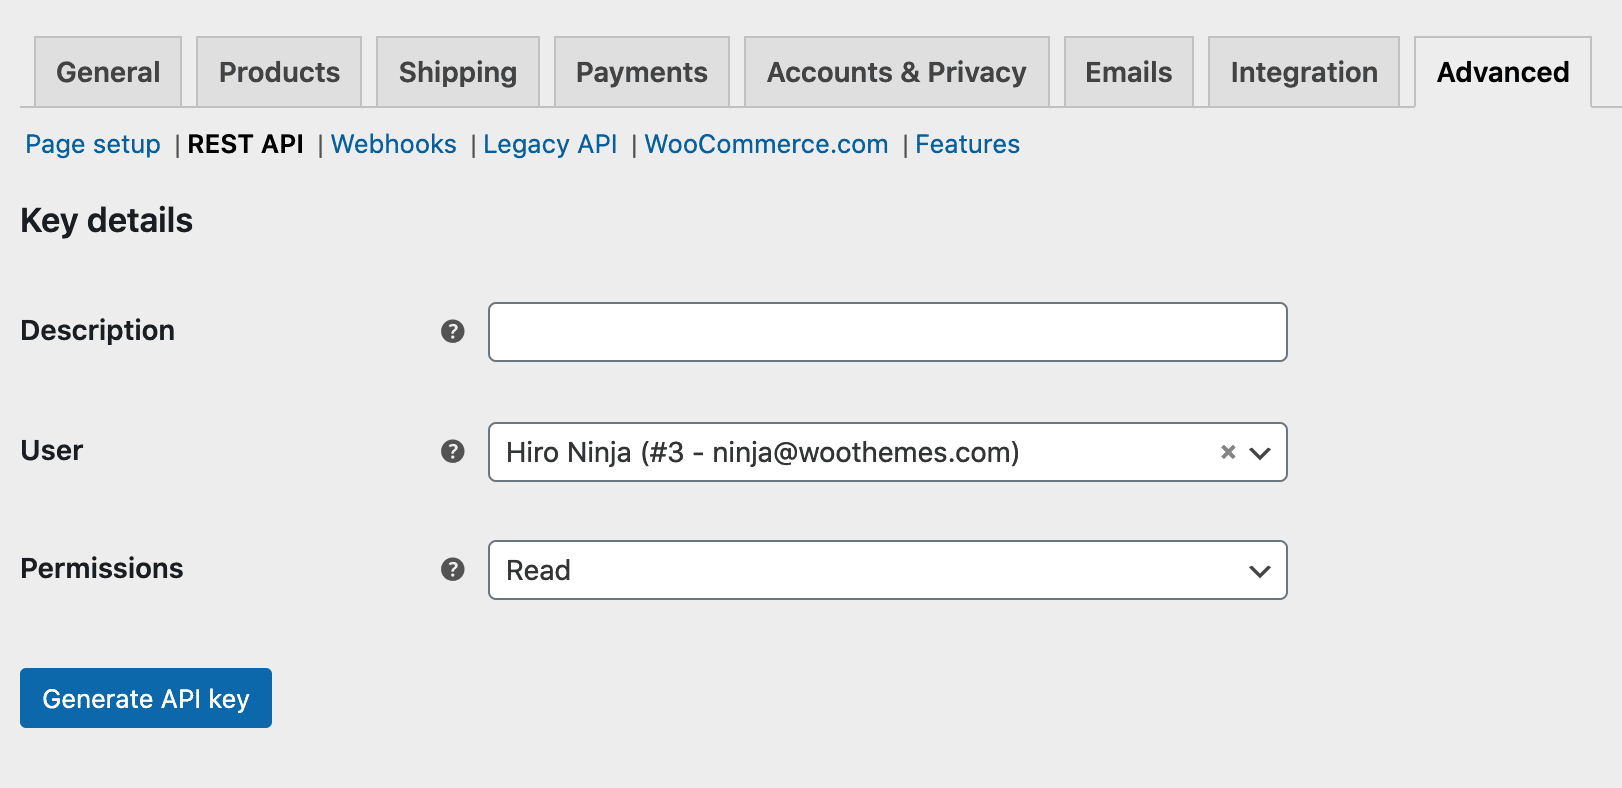
- Copy your Consumer Key and Consumer Secret.
Adding WooCommerce as a Data Source
- Log in to your Power My Analytics hub.
- Navigate to Sources from the main menu.
- Click + New Data Source.
- Select WooCommerce from the gallery of available sources.
- Enter your WooCommerce site address, Consumer Key, and Consumer Secret to authenticate.
- Click Connect to authenticate your account.
Creating a Data Studio Report
Follow these steps to create a Data Studio report using your WooCommerce data:
- In the Power My Analytics hub, go to Reports > Data Studio
- Select WooCommerce under Create Data Studio Report (this will open the official Data Studio application in a new window)
- Google Data Studio Configuration:
- Step 1:
- Name your data source (e.g., "WooCommerce - Your Store Name")
- Choose your Power My Analytics hub from the dropdown
- Optional: Leave "Use report template for new reports" checked to use the PMA demo template
- Click Next
- Step 2:
- User Account: Select your WooCommerce account or "Sample Account" for sample data
- Click Next
- Step 3:
- Choose your preferred currency for reports
- Optional: Choose “Optional - Order Status Filter” for reports
- Optional: Allow “Optional - Order Status Filter” modification in reports
- Click Connect (top right)
- Step 4:
- Click Create Report (top right)
For a quick start, use our pre-built WooCommerce demo template.
Key Reports and Fields
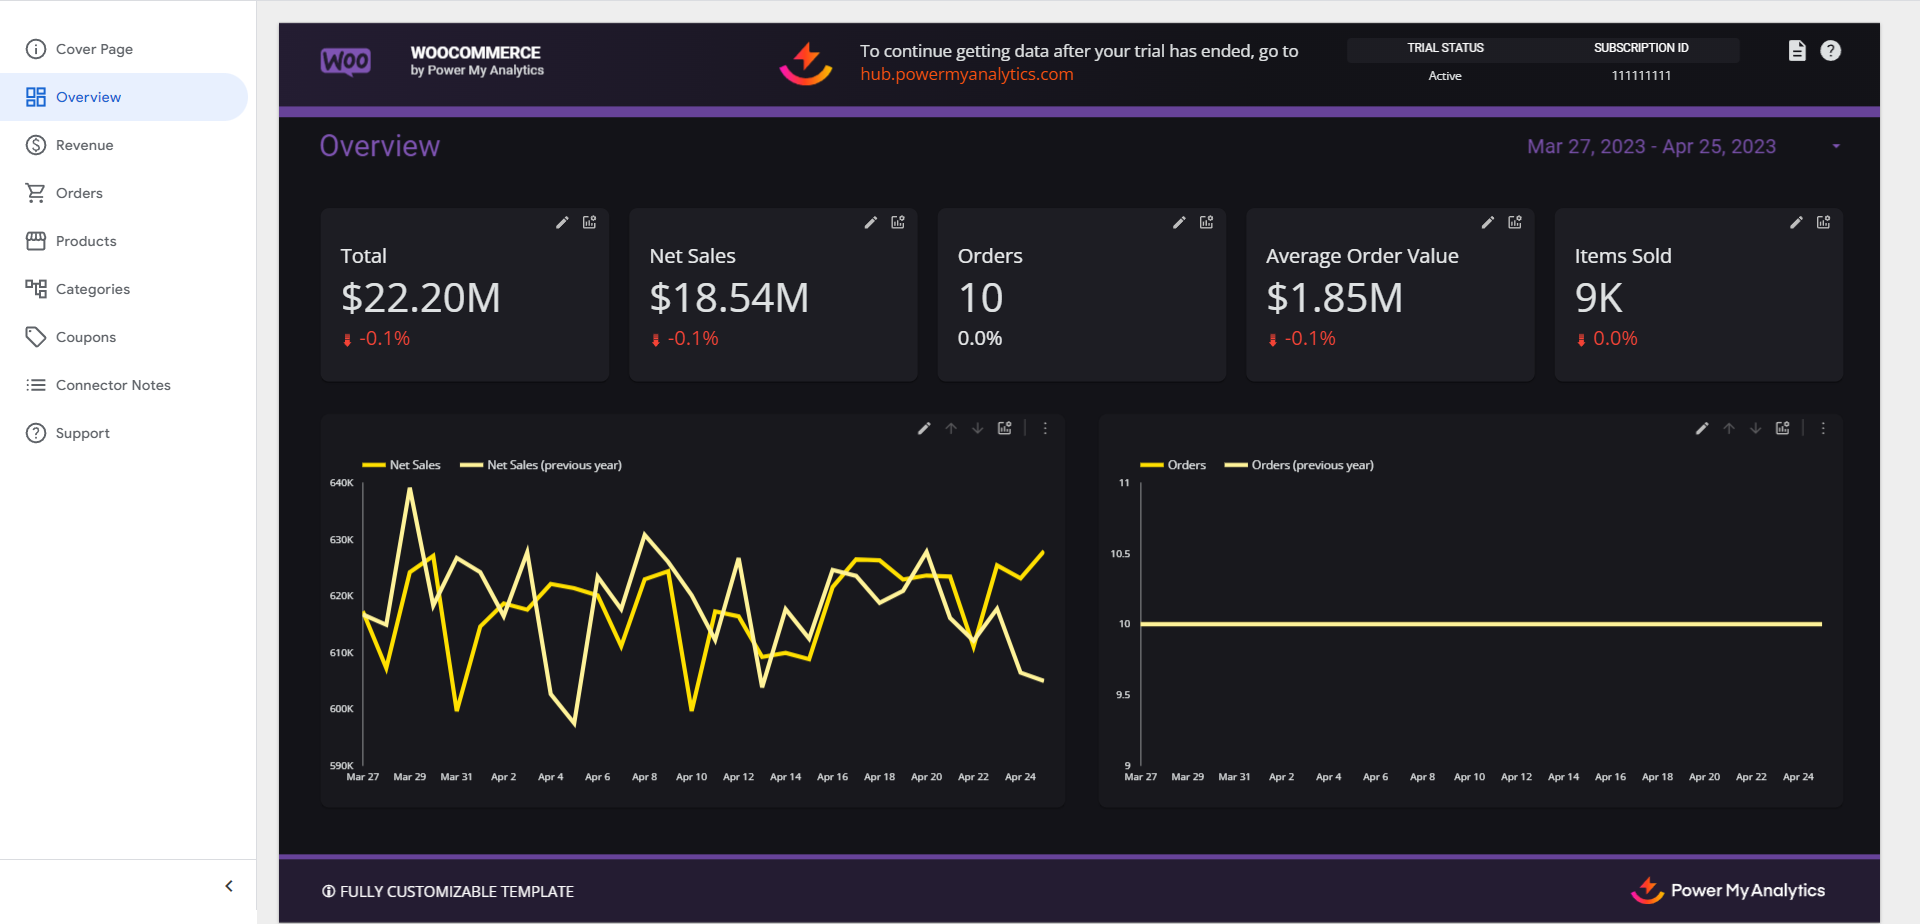
WooCommerce data in Power My Analytics offers a wide range of metrics and dimensions. Here are some popular metrics you can use in your reports:
- Revenue Metrics: Gross Sales, Returns, Discount Total, Net Sales, Total Tax, Shipping Total, Total
- Order Metrics: Orders, Net Sales, Average Order Value, Average Items Per Order, Items Sold
- Product Metrics: Items Sold, Net Sales, Orders, Variations, Stock
- Category Metrics: Items Sold, Net Sales, Orders, Products
- Coupon Metrics: Discounted Orders, Discount Total, Items Sold, Net Sales, Total
For a complete list of available WooCommerce fields, refer to the Schema Explorer.
Limitations and Important Considerations
- Cached Data Requests with Unique Metrics and Date Dimension: When a unique metric is paired with the date dimension, this will result in a request for cached data instead of a request for live data. For more information, please see Understanding Cached and Live Data Requests.
- Backfilling: Power My Analytics performs an initial backfill of 24 months of data when you first connect your WooCommerce account as a data source.
- Order Status reporting: To match the WooCommerce dashboard, choose "Completed," "Pending," and "Processing" for the "Optional - Order Status Filter" when configuring Data Studio parameters.
- Incompatible plugins: If data is visible in your WooCommerce UI but not in your report, it may be due to an incompatible plugin. Contact WooCommerce support to resolve issues with incompatible plug-ins.
Unavailable Data
- Data from WooCommerce subscription APIs
- Order breakdowns (quantity, taxes, SKU) by subscription ID
- Subscription geographic details (location, taxes, fees paid by subscribers)
- Notes applied to subscription accounts
- Multi-store accounts (each store must be connected to PMA individually)
- Realtime data
- Custom fields
Reporting WooCommerce Order Statuses in Data Studio
The order information we receive from WooCommerce's API includes many possible order statuses. If you would like your reports to match what appears on WooCommerce's dashboard, you must choose only Completed, Pending, and Processing.
There are three ways to filter order statuses:
Choose order statuses on the connector configuration screen
You can choose one or several order statuses from the drop-down box. Select "Allow 'Optional - Order Status Filter' to be modified in reports" if you would like the ability to add or remove order statuses in different charts within your report.
Add a control to your page
In Data Studio:
- Select Add a control, then choose Drop-down list.
- Use Order Status for the control field and Order ID for the metric. This control will apply to the entire page.
Create a filter
In Data Studio:
- Select your chart.
- Click Add a filter in the data menu on the right.
- Name your filter, then select:
- Include
- Order Status
- Equal to (=)
- Completed, Pending, Processing
- Click Save. This filter will apply only to the chart you had selected.
Troubleshooting
See our article Basic Troubleshooting for information on issues that may affect the WooCommerce connector.
Related Articles
BigCommerce Data Connector User Guide
Are you looking to streamline your BigCommerce data analysis and reporting? Power My Analytics' BigCommerce connector automates the collection and integration of your e-commerce data, saving you time and providing deeper insights into your online ...Walmart Data Connector User Guide
Are you looking to streamline your Walmart marketplace data analysis and reporting? This guide will walk you through the process of connecting your Walmart seller account to Power My Analytics, enabling you to automate data collection, centralize ...Mailchimp Data Connector User Guide
Are you looking to streamline your email marketing analytics and reporting? Power My Analytics' Mailchimp integration allows you to easily connect your Mailchimp account, automate data collection, and create powerful reports. This guide will walk you ...ShipStation Data Connector User Guide
ShipStation is a powerful e-commerce shipping solution that helps businesses streamline their order fulfillment process. This guide will walk you through how to connect ShipStation to Power My Analytics, create reports, and leverage key metrics to ...Shopify Data Connector User Guide
This guide will walk you through the process of setting up and using Shopify as a data source in Power My Analytics. By connecting your Shopify store, you'll be able to automate data collection, centralize your e-commerce metrics, and easily create ...